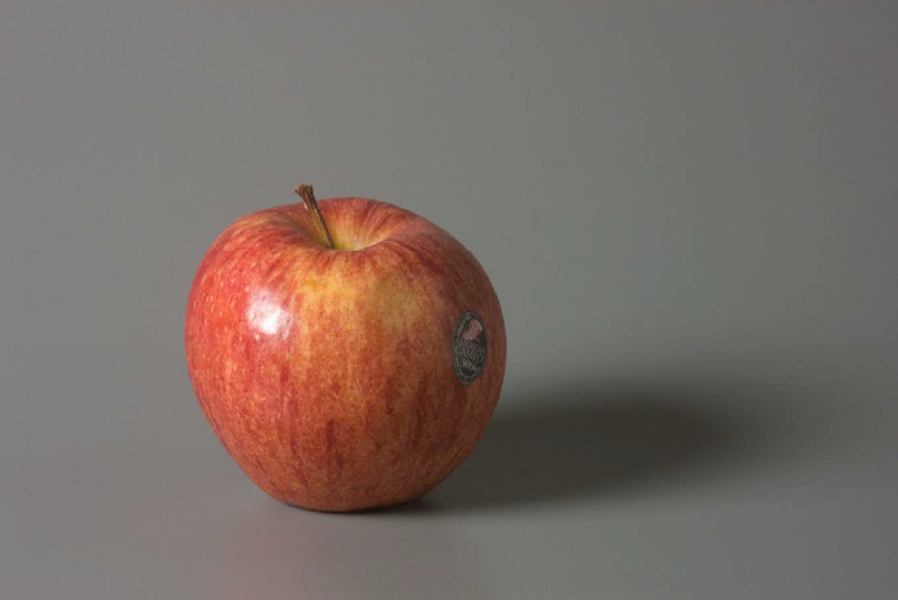
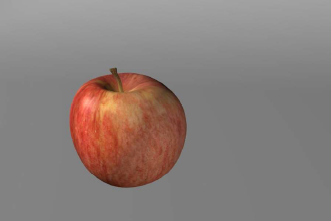
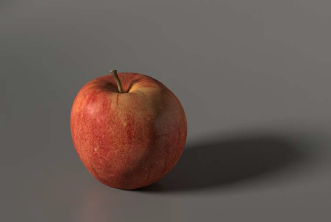
The following is a generalized outline of 3D model development; there are certainly variations on the process, software, techiniques, and approach. This is just one way; but it is typically the approach we use when modeling 'from scratch'. Here's how we'll replicate this digital photo of a Gala apple.

Modeling is the first step in animation development; after all , you need something in the scene to animate. It is possible to start with a model created in other software (such as CAD/CAM: Computer Aided Design / Computer Aided Modeling). In fact, it is desireable to use such models if they exist. In this example, we will start from scratch, to illustrate the entire process. If you have done CAD/CAM or architectural work, you may find certain aspects peculiar to animation-oriented software.
We will develop a virtual model of the scene in 3 stages: modeling, texturing, and lighting. This sequence is not fixed, and is frequently iterative, that is, after some lighting work, the model and textures are adjusted, then the lighting is adjusted some more, which might point up the need for more model adjustments. Due to this flow of progressive refinement, early tests are put in front of the client to help spot any errors that would lead to wasted time in refining a model that has mistakes. These early tests may look crude in many aspects. This is even more true when animation is involved, as motion can influence where detail be omitted as superfluous, or should be increased.
Step one: the basic model.
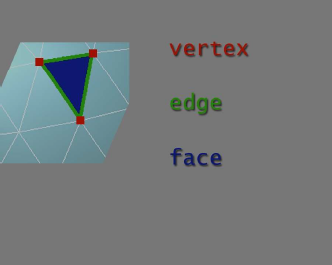 Most animation software uses the concept of meshes to create geometry objects. A mesh can be thought of as a set of points in space (vertices) joined by lines (edges) to create solid polygons (faces).
Even if one uses smooth curves on-screen to create geometry, the curved surfaces are typically converted to meshes when the computer calculates the final rendered image. The more vertices, edges, and faces, the more potential detail in the object. But, as there is no free lunch, even in computer graphics, adding faces requires more memory, and more calculations.
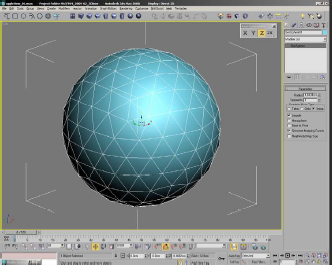
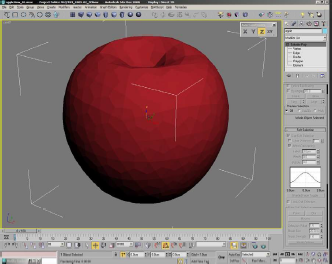
Modeling frequently starts with a basic geometric shape. In this case a sphere, as that is pretty close to an apple.
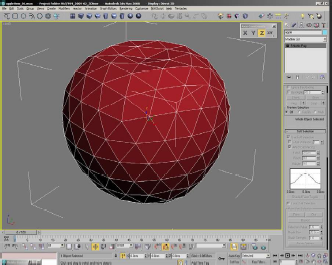
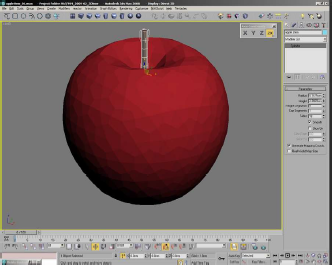
Here, we’ve given the object a flat red color, and moved around some of the vertices to get closer to the shape of our real apple.
We have moved more vertices, added some detail, and smoothed the surface a bit. You can see the underlying structure, even without the edges being visible.
The next thing our apple needs is a stem. It too starts as a primitive object: a cylinder.
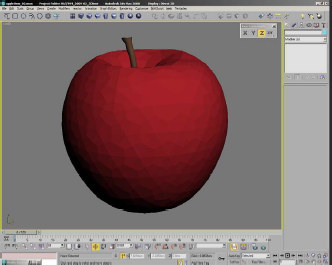
Some pushing, pulling, scaling and bending of the vertices gives us a more appropriate stem. We also add a curved surface underneath the apple object to simulate the laminate background used in the photo. It’s grey, so doesn’t really show up here. Now is also a good time to add a virtual camera, so we see the scene in a perspective view that matches the original photo. If we click on the “render” button, the software calculates the light falling on the objects and produces a “final” rendering.
Not very impressive, is it? The next step is to create an image that can be “wrapped” around the apple object to mimic the surface texture of the real apple.
Step two: Texturing
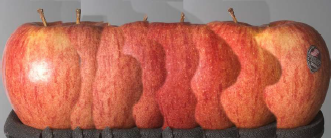 In preparation for this step, we took a series of photos of all sides of the apple. You can see them roughly composited here; this will be used for reference. The trick is to end up with a seamless texture that approximates the color variations of the real apple, without any lighting or shading. The lighting and shading will be added by the rendering process.
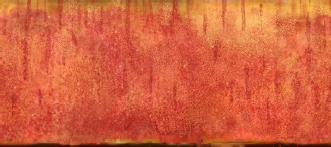
After a fair amount of Photoshop work, we have this texture map. Retouching is also required so the left and right edges match seamlessly once we wrap the image around the apple.
Another rendering produces this image. Much more apple-like, but still quite flat and lifeless.
Step three: Lighting
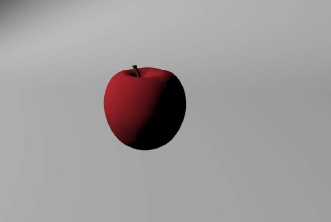
The previous image was lit by the default lighting setup, which has 2 generic light sources. The render will get worse before it gets better. Initially, we add a key light. With only one light source, the dark side of the apple is very dark, as seen in this image.
We add a fill light. Now we’re pretty much back to the flat lighting of the default lighting setup, with one important difference: we can now adjust many parameters for each virtual light. To start with, we’ll make the key light cast a shadow.
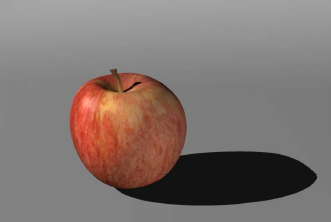
The initial shadow render. The apple appears to be sitting on a surface, but it’s still not very believable. The extra calculations for the textures and shadow have increased the render time from 16 seconds to 35 seconds. The next step will really make the CPU do some work.
Refining the lighting:
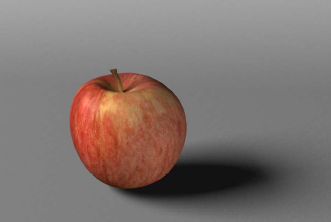 The original photo was taken using a “softbox”, which creates a diffused soft light source, with corresponding soft shadows. We can simulate this by changing the properties of our virtual light. We now have a much better sense of space and weight to our virtual apple. The shadow side still looks flat, as there is too much fill light. We could just lower the intensity of the fill light; and years ago this would be about the only option. Light in the real world behaves differently: it bounces off objects, and reflects back.
 We can actually simulate this light bouncing. The technique in computer graphics is commonly called global illumination or radiosity. Technically, these are specific software algorithms; we will actually use contemporary variant of those algorithms, but the end effect is similar. Here we’ve replaced the fill light with a virtual reflector card. The laminate color of the background has also been matched more closely to our reference. Much closer, though now the rendering takes 1:10 —almost twice as long. No free lunch. Yet, the apple is still a bit dull. The reason: we have no reflections.
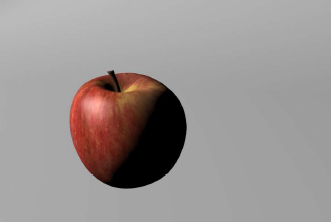
 We can “fake” simple reflections, but since we want a good recreation of the original scene, we will do proper ray-traced reflections in this scene. This allows us to create blurry reflections, and reflect scene objects that are out-of-frame, such as the reflector card on the right. You can now see a slight highlight from the reflector on the upper right side of the apple. There is also a blurry reflection of the apple on the laminate surface. You might not have noticed this detail in the original photo.
We decide to re-paint the texture some to better match our original apple. The lighting still needs some adjustment, and as the real apple is not perfectly smooth, we want to do some additional texture mapping.

It’s called a bump map, and is used (not surprisingly) to simulate bumps on the surface. These could be rivets, diamondplate textures, cracks, pits, etc. In this case, we’re using a noise texture to add a small amount of randomness to the surface. When rendered, the white areas will be calculated as a bit “higher” than the black areas. A bump map does not add any actual detail to the model, but for adding a touch of imperfection, it’s just the thing. One last item to add is a second texture map so we can include the label. We painted that image with a built-in mask to correspond to the oval shape.
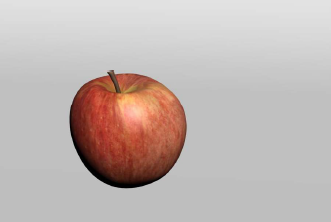
For comparison, the original photo:
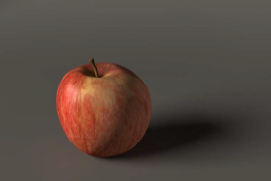
Our final image, as rendered:
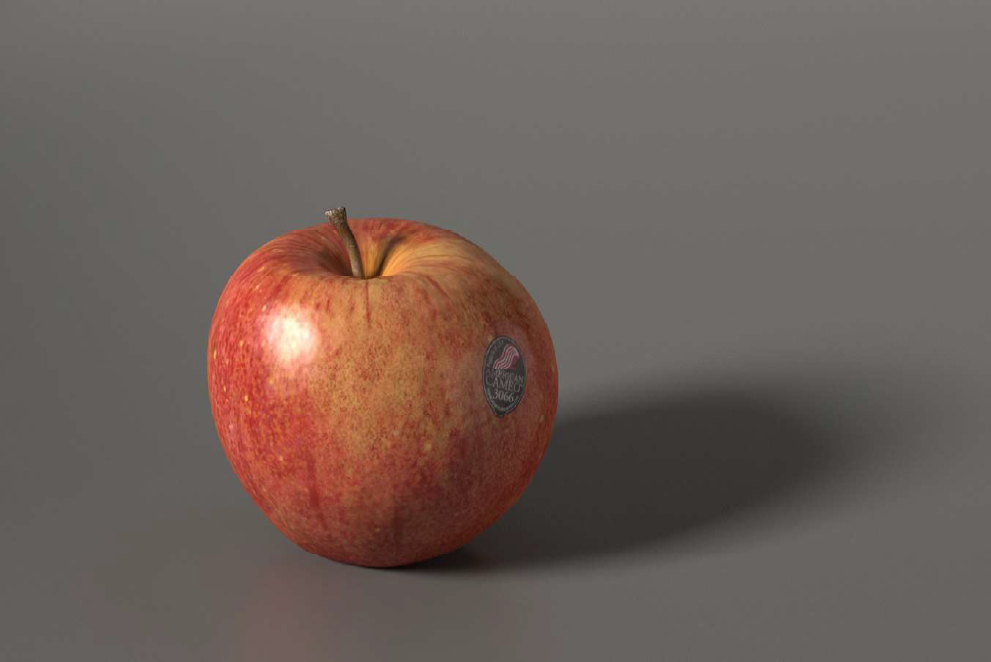
The rendering time for this image was 2:10. Not bad, but do keep in mind that animation usually requires 24 or 30 frames per second. At 30 FPS, this simple scene would need almost 11 computer-hours to render a 10-second animation at HD resolution. Feature-film animation frames may take 4 to 8 hours (per frame!). At Fire Mist Media, we use cloud rendering resources when needed, to add dozens or hundreds of rendering computers to our studio.
Document originally produced in 2009, some information updated Feb. 2020. (C)2020 Fire Mist Media